
Cistern Liner Installation: How to Install Your Custom Liner
A photo-led, step-by-step guide to draining, preparing, lining and filling your cistern, with real photos from a Cistern Liner Co. install.
- Six clear steps, from confirming the liner to the first fill
- Confined-space safety and tool control built in
- Prefer a pro? We install across Eastern Ontario
Download the PDF guide (9 pages)
No exact measurements needed. Phone photos are fine.
Safety first: a cistern is a confined space
- Test the air and ventilate before entry. Low oxygen and harmful gases can be present in a cistern that looks clean.
- Never work alone. Keep an attendant outside the opening at all times, with a way to call for help.
- Use GFCI-protected power, keep cords and lights up out of any water, and secure lights so they cannot fall.
- Isolate anything that could refill the cistern or energize a pump while you are inside.
- Secure the ladder, pad its feet and keep the opening clear. When in doubt, hire a professional.
The golden rule: nothing sharp or hard touches the liner
Keep every drill, driver, bit, knife and Tapcon screw in one padded tool bag, with screws in a closed container inside it.
- When a tool is not in your hand, it is in the bag. The bag never sits on the liner.
- Utility knife blades stay retracted or capped between cuts.
- Count tools and screws in and out of the cistern, every time.
Tools & materials checklist
Read the guide once, start to finish, before installation day. Your project drawings, supplied fittings and manufacturer instructions always take precedence.
Drain & clean
- Submersible sump pump + discharge hose
- Bucket to seat the pump at the low point
- Wet/dry shop vac
- Stiff push broom
- LED work lights + GFCI extension cord
- Ladder with padded feet
Strapping & underlayment
- Hammer drill + carbide masonry bits
- Tapcon concrete screws (sized to the maker's chart) + driver bit
- Wood strapping for the perimeter
- Level or chalk line, tape measure
- Rigid foam board for the floor (1″ XPS shown)
- Foam sheet roll for the walls
- Duct tape, utility knife, straightedge
Liner, safety & records
- Your custom liner, drawings and fitting kit
- Padded tool bag + closed screw container
- Clean gloves; clean soft-soled footwear or socks
- Headlamp
- Eye, ear and dust protection (respirator for concrete dust)
- Gas monitor / ventilation fan
- Phone or camera for records
When professional installation is the better call: if entry requires a confined-space permit program, the hatch is small or elevated, the cistern is deep or unusually shaped, the liner is too heavy for your crew, fittings are complex, or the structure or atmosphere is uncertain. Not sure? Send us photos and dimensions and we will advise before you commit.
Confirm the liner & cistern
Check everything before you drain a drop.
- Liner ID and project reference match your cistern.
- Dimensions (length, width, depth or diameter) and corner layout match your drawing.
- The access opening is big enough for the folded liner, your crew and your tools.
- Every penetration (inlet, outlet, overflow, drain, sensor) is identified on the drawing.
- The fitting kit and attachment hardware supplied for your project are on site.
- Photograph walls, corners, ceiling, hatch and each pipe before work starts.
Drain & prepare the cistern
Remove the water, then get the floor clean.
- Take it out of service. Arrange backup water if you need it and isolate inlets, pumps and power.
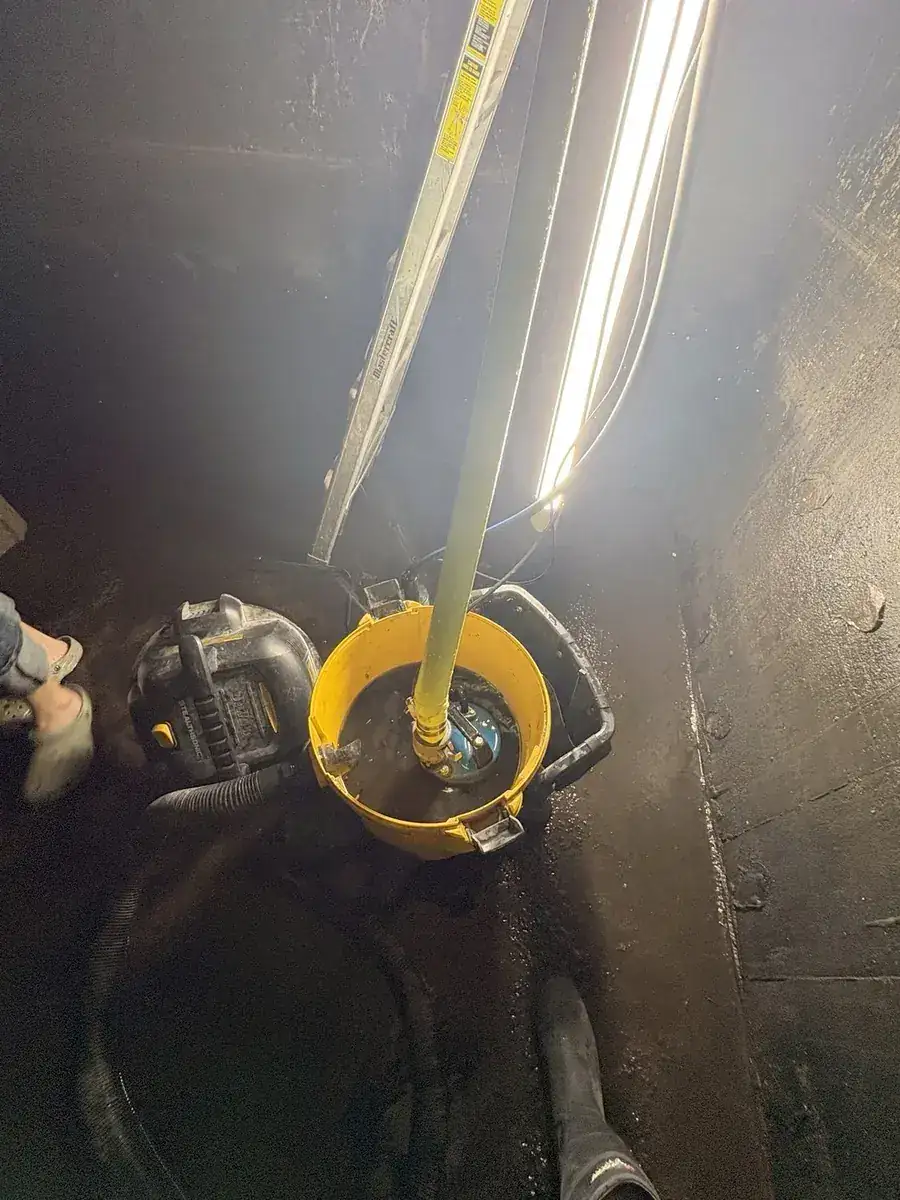
- Pump it down. Seat a submersible pump at the lowest point (a bucket works well) and run the discharge hose well away from your foundation, downslope, to a permitted drainage area.
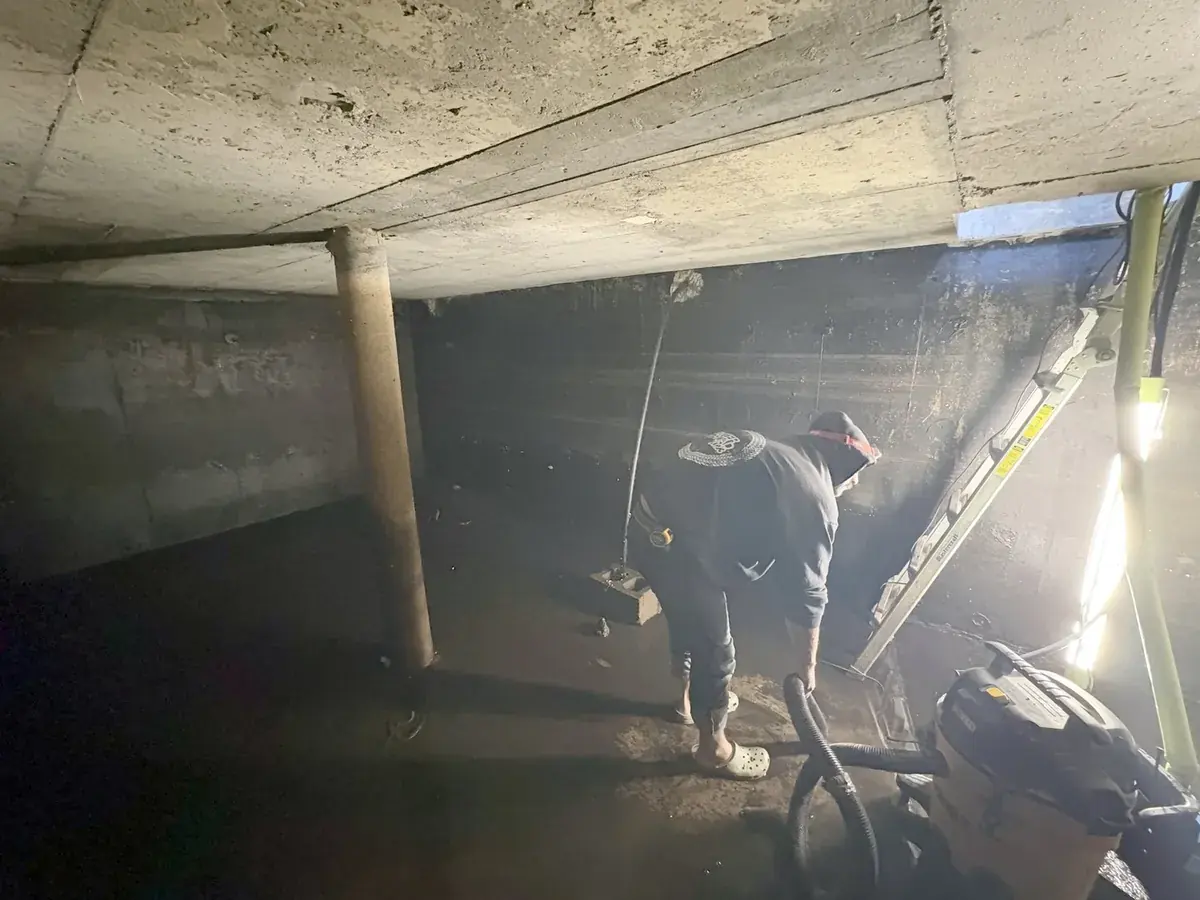
- Vacuum the rest. When the pump loses suction, switch to a wet/dry vac to lift the last water and sludge. Sweep walls and floor toward the vac and repeat until clean.
- Light it safely. Hang work lights from the ladder, clear of any water, and keep cords off the wet floor.
- Dispose of sludge according to local rules, never onto the liner staging area.
Inspect & prepare the interior
A smooth, safe surface is what protects your liner.
3A. Inspect and clean every surface
- Look for loose or flaking concrete, sharp aggregate, protruding metal or old anchors. Remove, grind or chip them flush.
- Loose, peeling or blistered coatings must come off. Smooth, well-bonded coating can stay. Brush and vacuum loose ceiling staining or growth so nothing drops onto the liner (potable-approved cleaners only).
- Fix active leaks or seepage first. A liner is not a structural repair.
- Mark and photograph every penetration before it is covered.
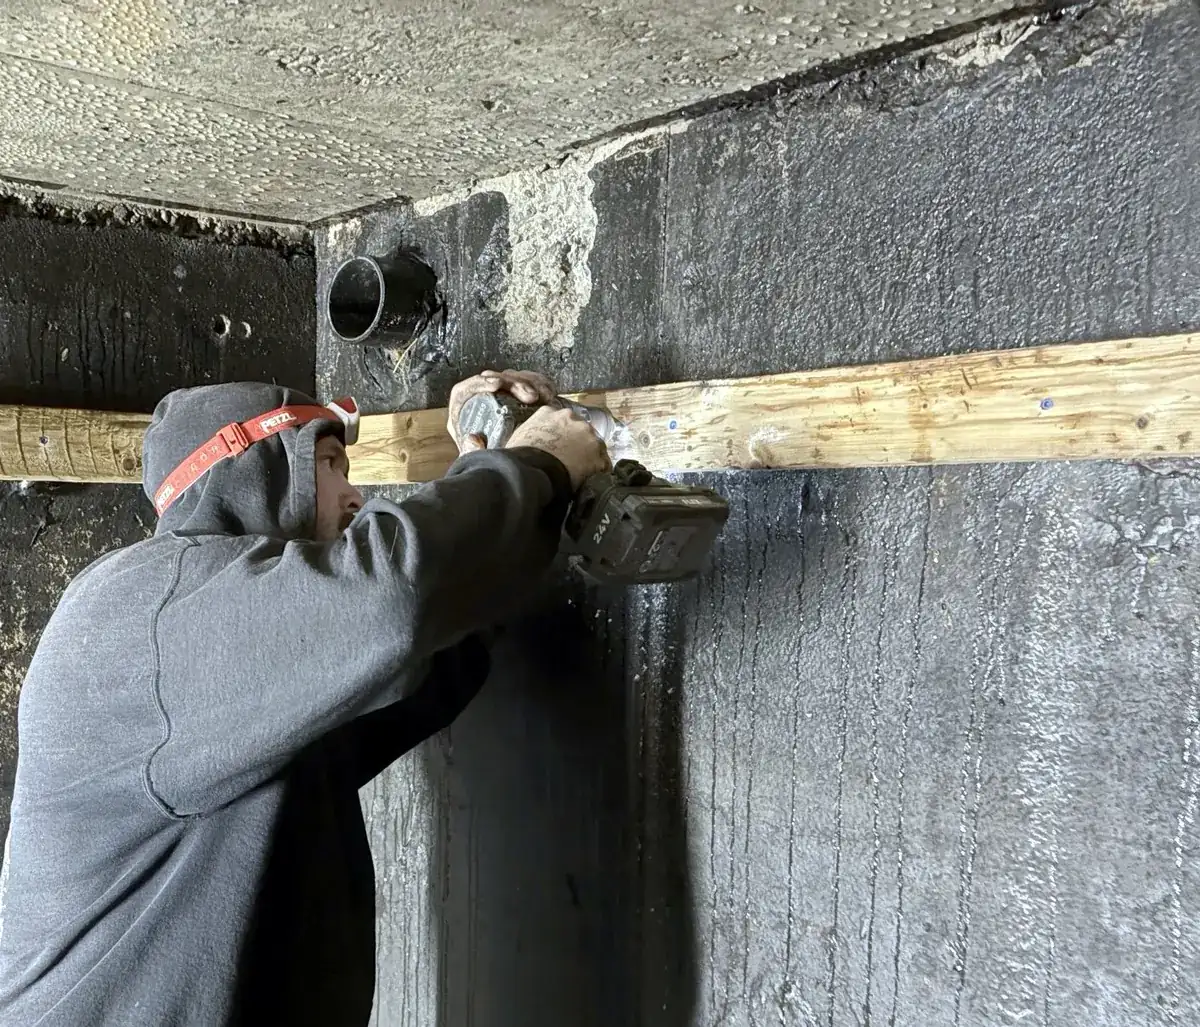
3B. Fasten perimeter strapping with Tapcon screws
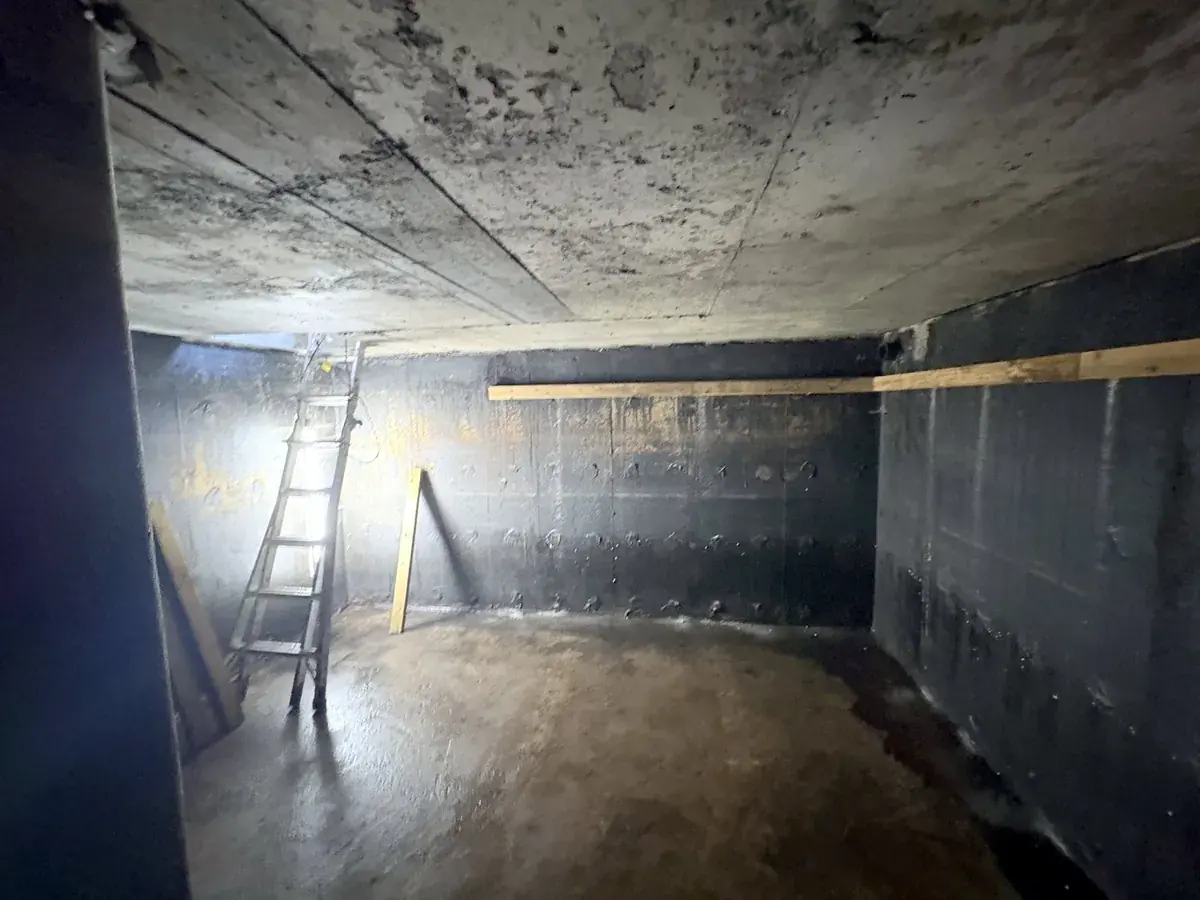
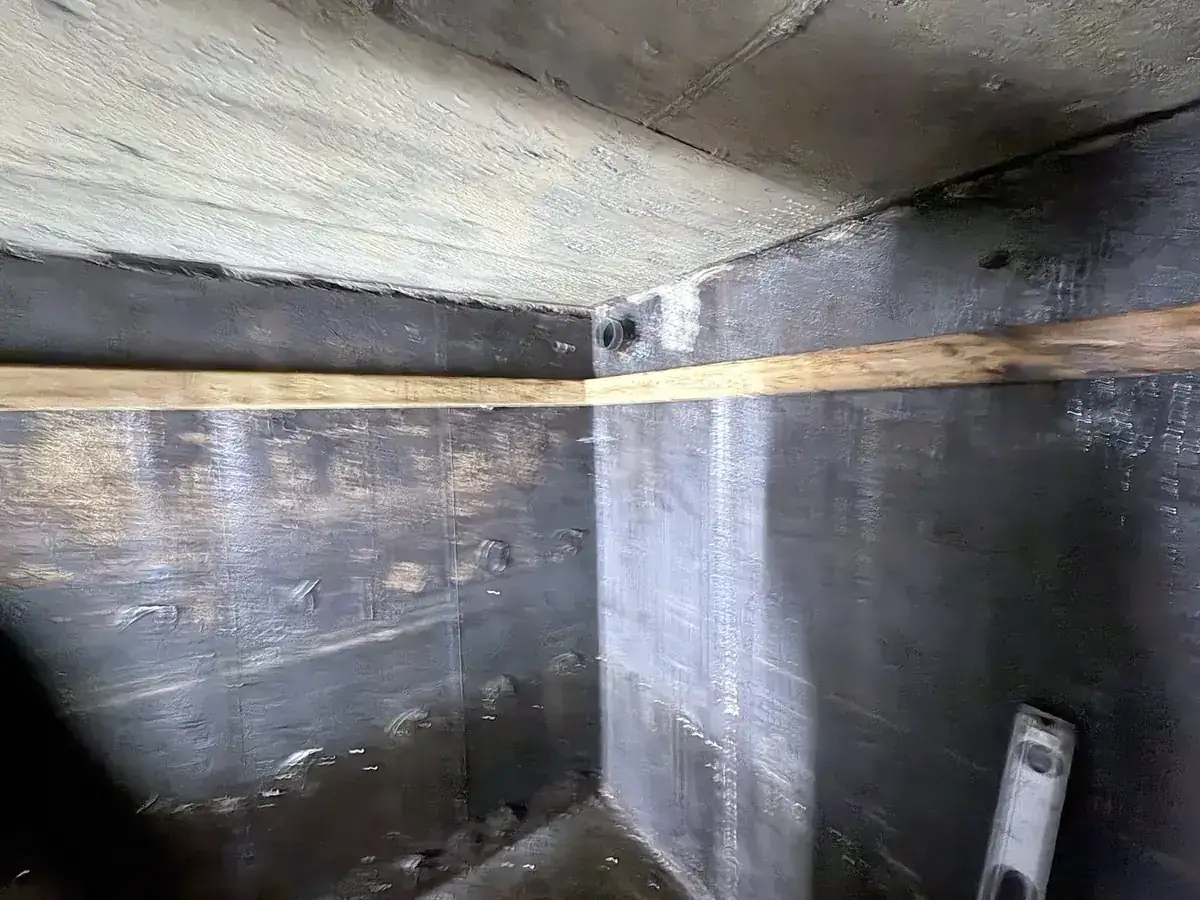
Strapping fastened around the top of the walls gives the foam and the liner a continuous, level attachment line.
- Mark a level line just below the ceiling, at the same height all the way around. Stay clear of penetrations and the hatch.
- Hold the strapping tight to the wall and run it continuously, with tight butt joints at the corners.
- Drill through the strapping into the concrete with a hammer drill and a carbide masonry bit matched to your Tapcon size. Drill slightly deeper than the screw will go, then vacuum the hole.
- Drive Tapcon screws until the head sits flush and snug. Do not over-drive. If a screw spins or snaps, drill a new hole beside it.
- Check by hand. Run a gloved hand and a rag along the strapping: no raised heads, protruding tips, splinters or burrs.
- Vacuum all dust and chips.
Follow the Tapcon maker’s chart for bit size, embedment and spacing, and wear eye, hearing and dust protection. Any raised screw head or splinter near the liner is a future puncture point.
3C. Protect the liner with a foam underlayment
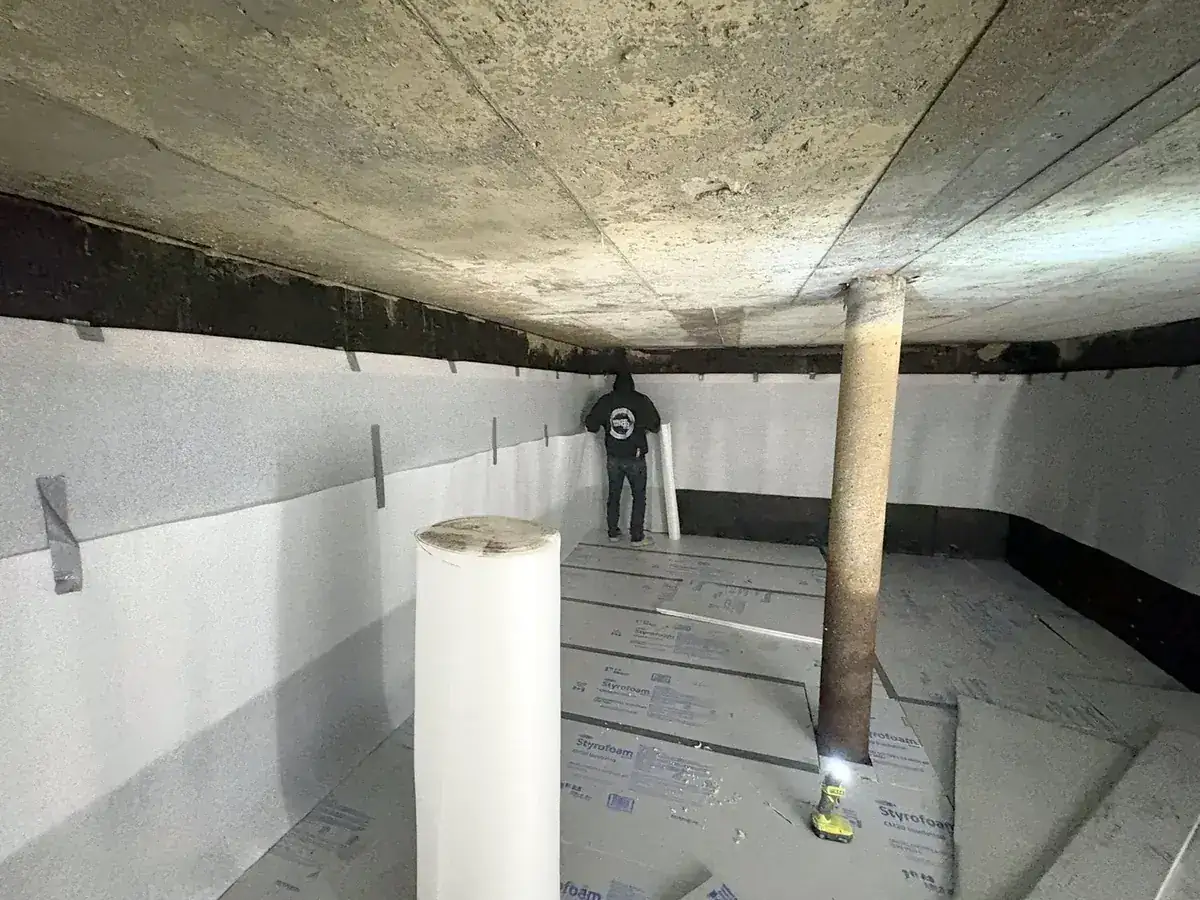
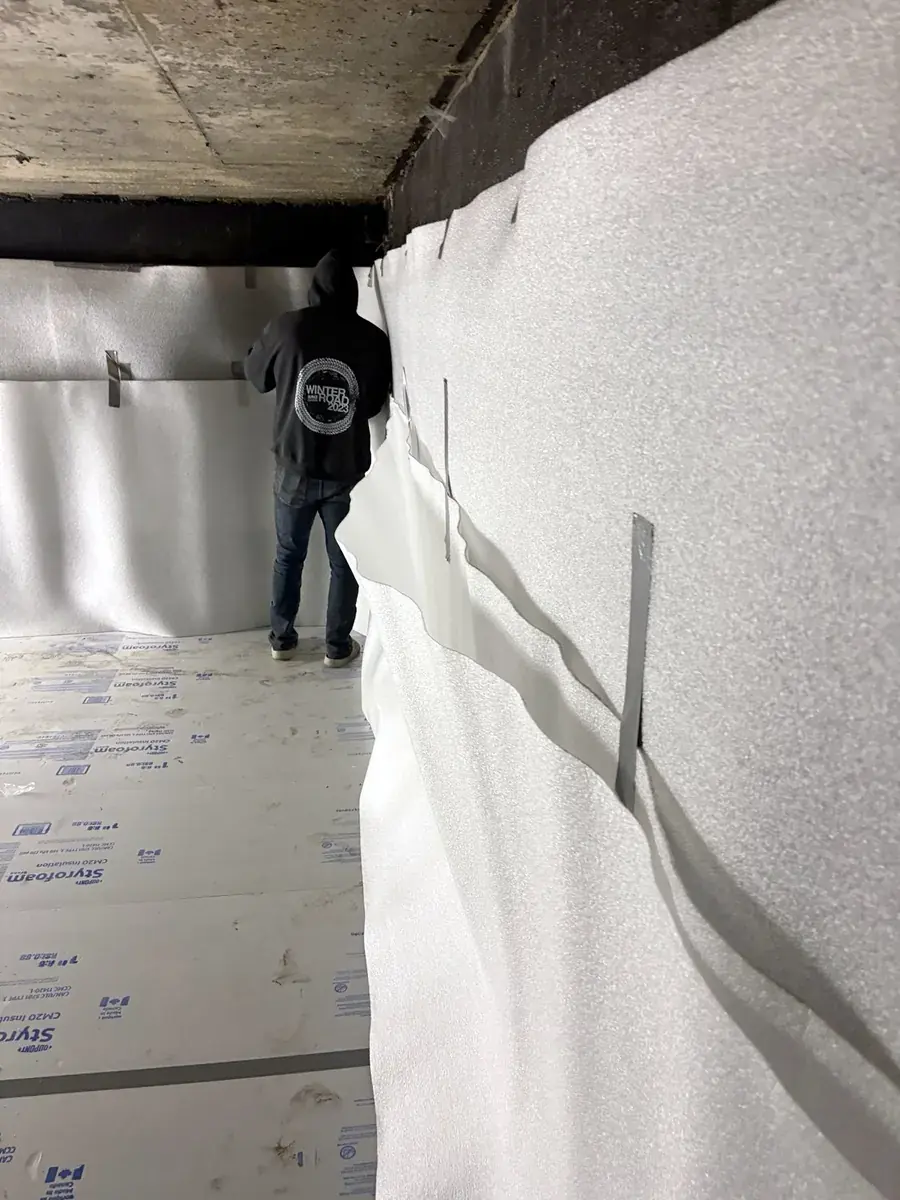
Foam on the floor and walls separates the liner from rough concrete and old coatings. Install it completely before the liner comes anywhere near the cistern.
Floor
- Lay rigid foam boards tight edge to edge, staggering the joints.
- Cut neatly around posts, drains and fittings.
- Vacuum all foam chips and dust after cutting.
Walls
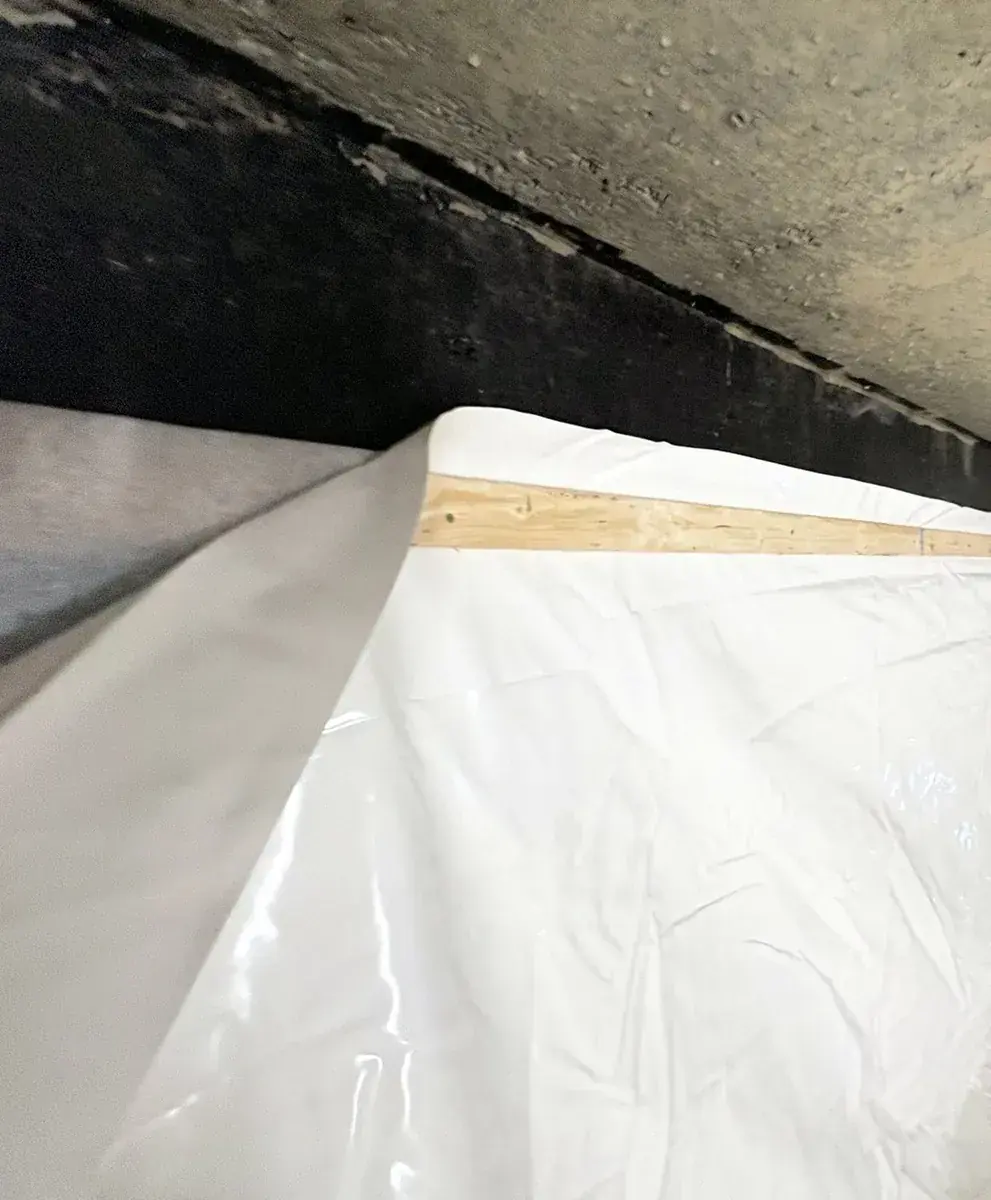
- Hang foam sheet from the strapping in horizontal courses.
- Hold it with flat duct-tape tabs, with no loose tails that can bunch under the liner.
- Overlap every seam so no bare concrete or coating shows through.
- Finish with a hand sweep to remove chips, tape ends and debris.
Posts & columns
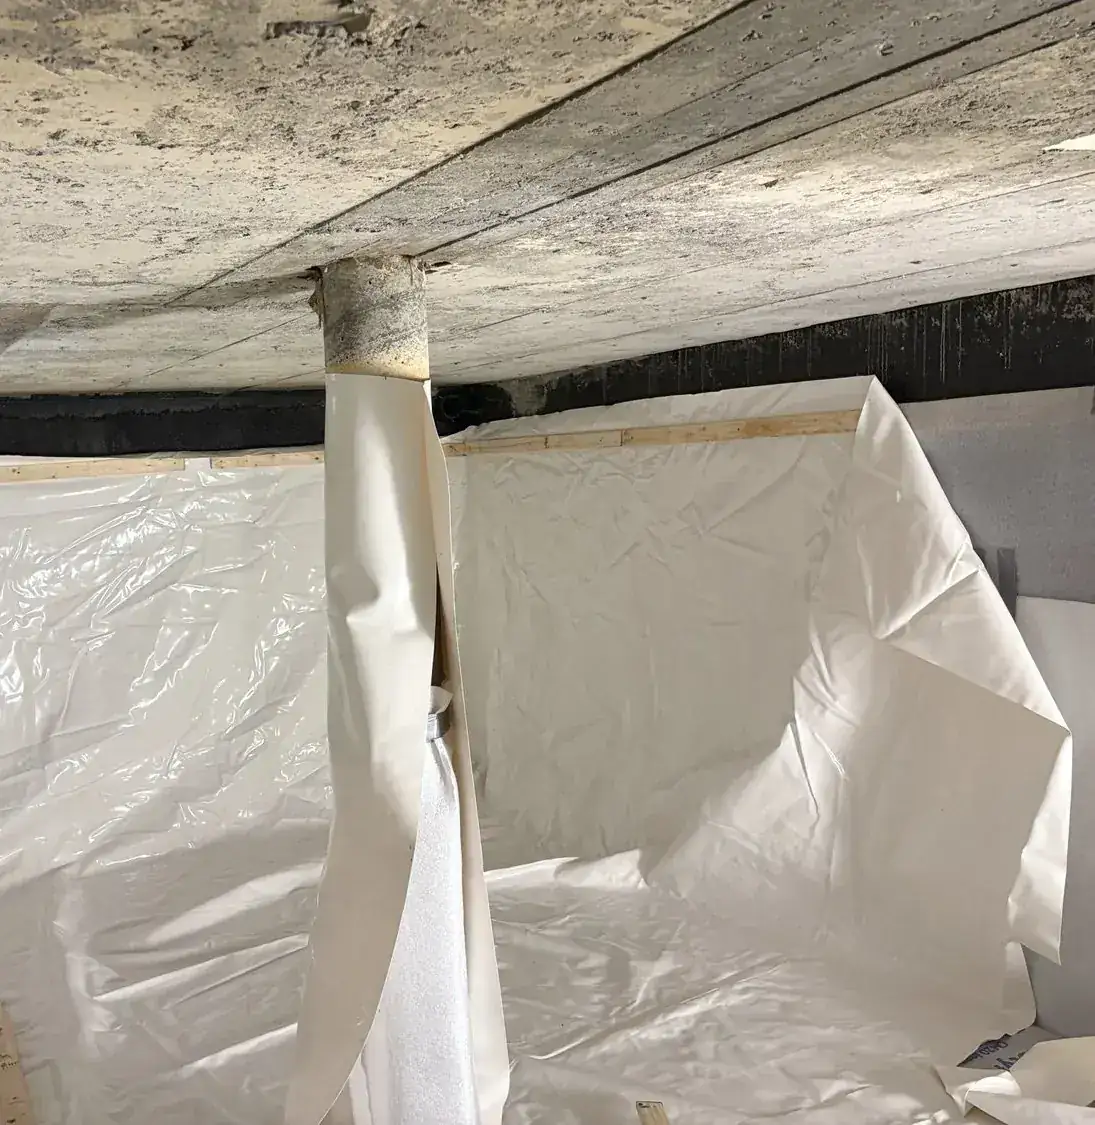
- Wrap each column in foam for its full height and tape it flat.
Cleaned, smoothed surfaces with smooth, flush strapping around the top.
Rigid foam on the floor, foam sheet on the walls, seams overlapped, columns wrapped.
Positioned without stretching and secured at the strapping. Nothing sharp ever touches it.
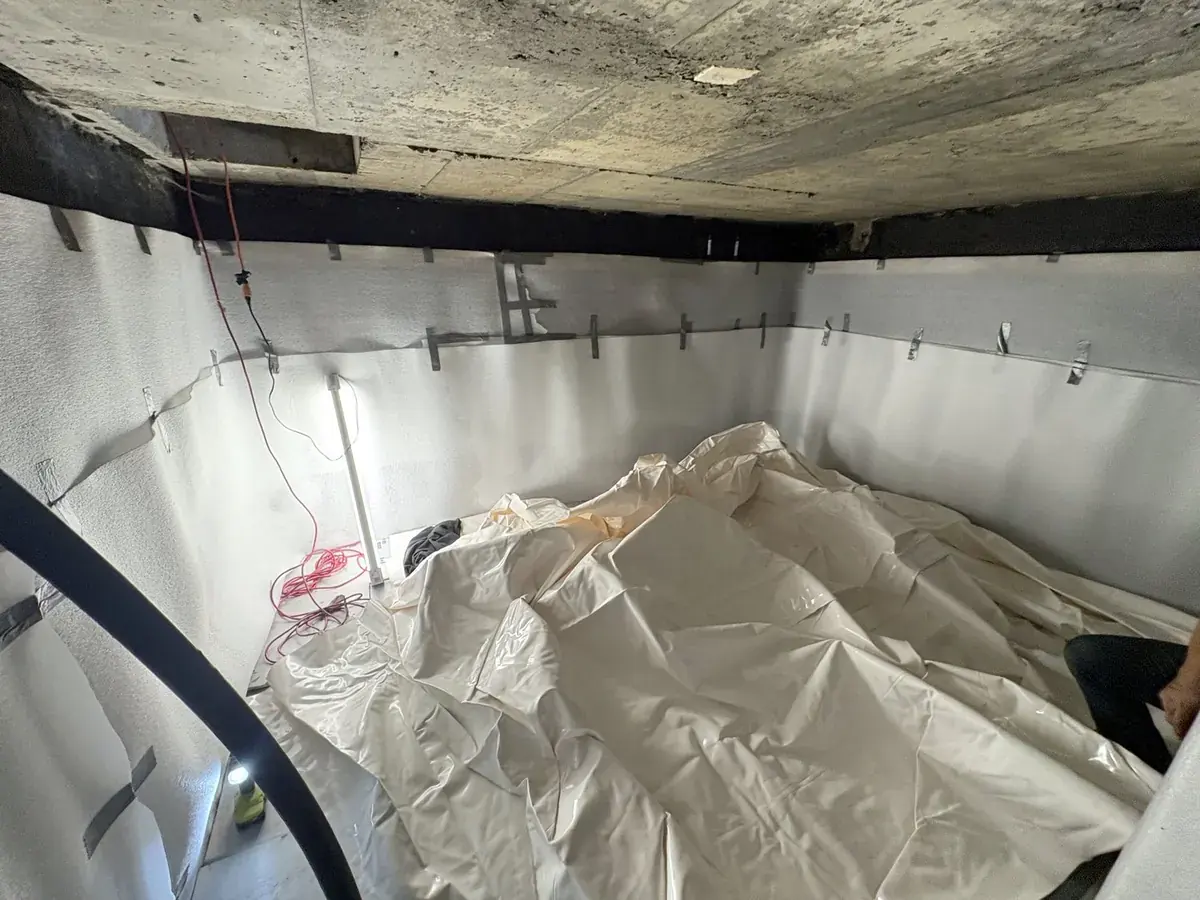
Position the custom liner
Unfold with care and let it sit naturally.
Before the liner enters the cistern, confirm the padded tool bag is at the opening, everyone has clean gloves and clean, soft-soled footwear or socks, and the crew agrees on orientation.
- Stage it clean. Open the packaging on a clean, protected surface. Never drag the liner across concrete or the ground.
- Identify orientation from your drawing: which walls, corners and fittings set the position.
- Carry it in folded and place it on the foam-protected floor, not on bare concrete.
- Open progressively in a controlled sequence, working from the middle out.
- Align the geometry: corners to corners, floor-to-wall transitions where they belong, fitting locations over their pipes.
- Pause and inspect. Fix twists, trapped folds or misalignment before you secure anything. Sweep a hand under and around the liner for tools, screws or debris.
Fit principles
- Do not stretch the liner to force a fit.
- Corners should sit naturally in the corners.
- Spread temporary folds out; never bunch excess in one spot.
- Do not trim “extra” material unless your instructions say to.
Tool control, again
- Drill, bits and screws stay in the padded bag.
- Never kneel or step on the liner in work boots.
- Re-count tools and screws before leaving the cistern.
Complete the fittings & connections
Top edge, posts, pipes and openings.
Secure the top edge
- Bring the liner edge up to the strapping and secure it with the attachment detail supplied for your project.
- Keep tension even along the run. No stretching, no forced pulls.
- No unapproved fasteners through the liner. Fasteners belong in the strapping, set before the liner goes in.
- Keep the edge clear of the hatch frame and ladder brackets.
Posts & columns
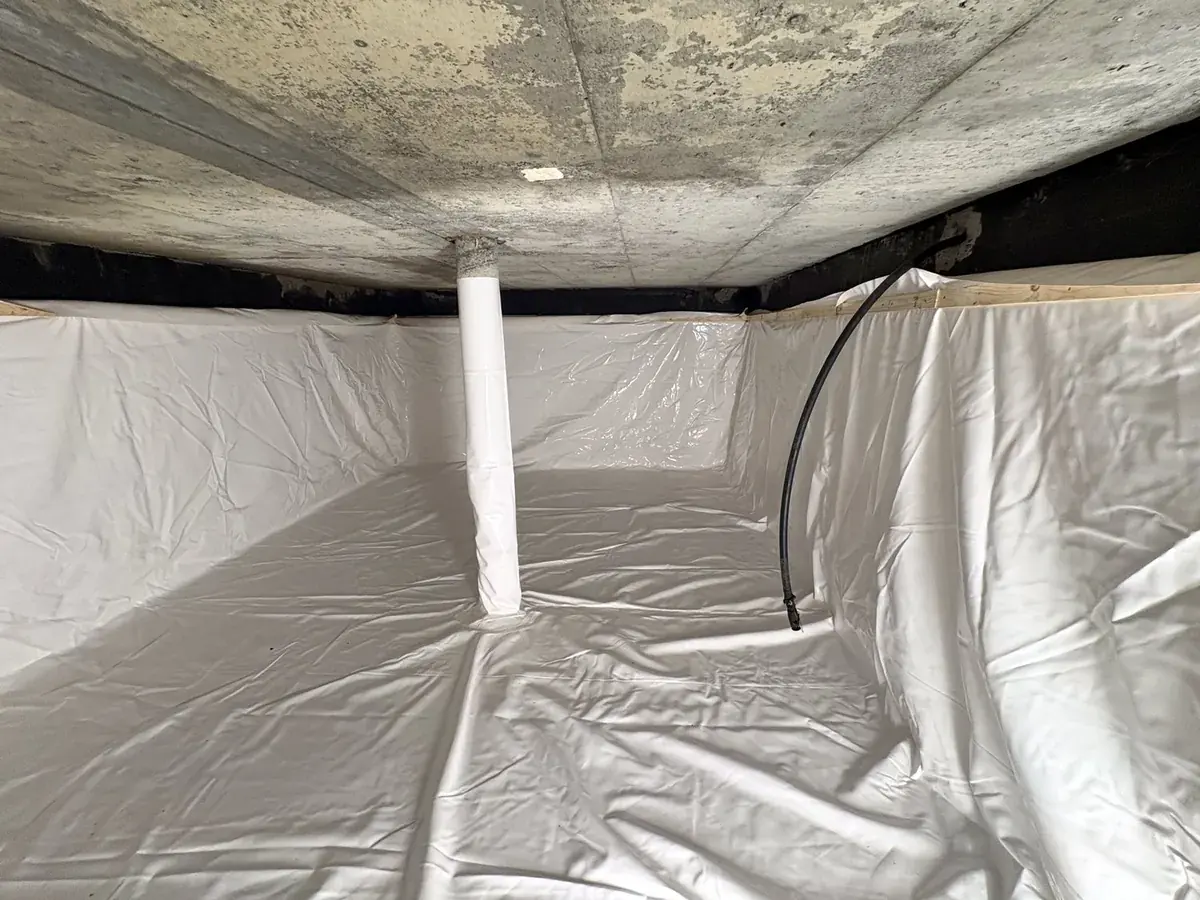
- Fit the fabricated sleeve over the foam-wrapped column, top to floor.
- Seal the base per your project detail and smooth out any twist.
Pipes & penetrations
- Inlets, outlets, overflows, suction lines and sensors each use the approved project-specific fitting.
- Confirm location and orientation before you cut anything.
- Check the right gaskets, flanges, clamps or boots are on hand and clean.
- Support pipes independently. A liner fitting must never carry a pipe’s weight.
- Photograph every completed fitting.
Inlet, outlet and overflow fittings
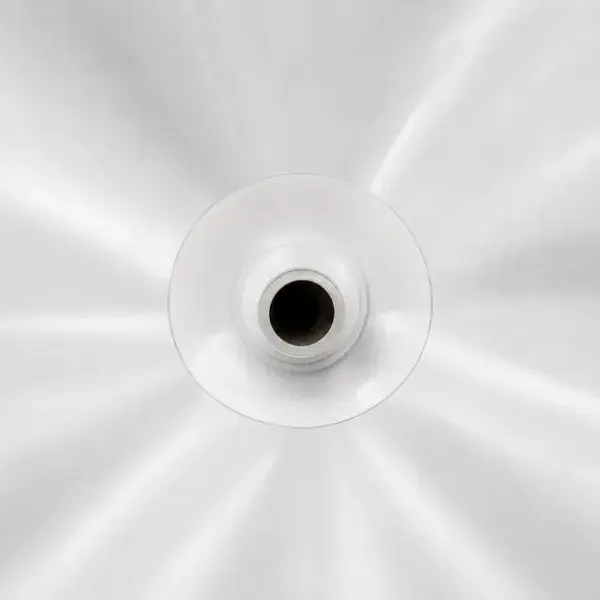
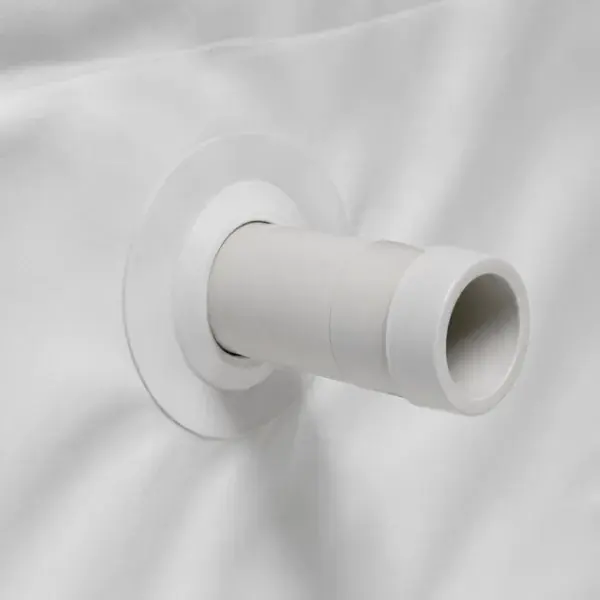
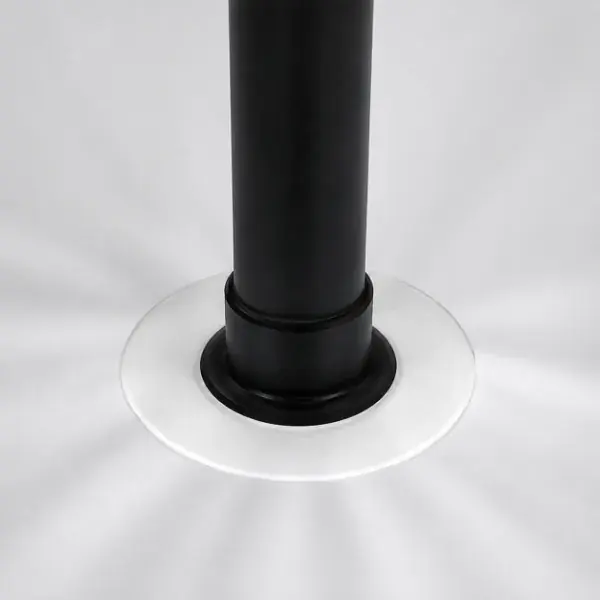
Never cut the liner to “make it fit”. If a fitting does not line up, or you are unsure of the detail, stop. Photograph the issue and call us at 1-613-985-8223 before cutting, drilling, gluing or sealing anything. At the access opening, protect the liner at the hatch, ladder and frame; most accidental damage happens on the way out.
Inspect before returning to service
Fill slowly and watch for problems.
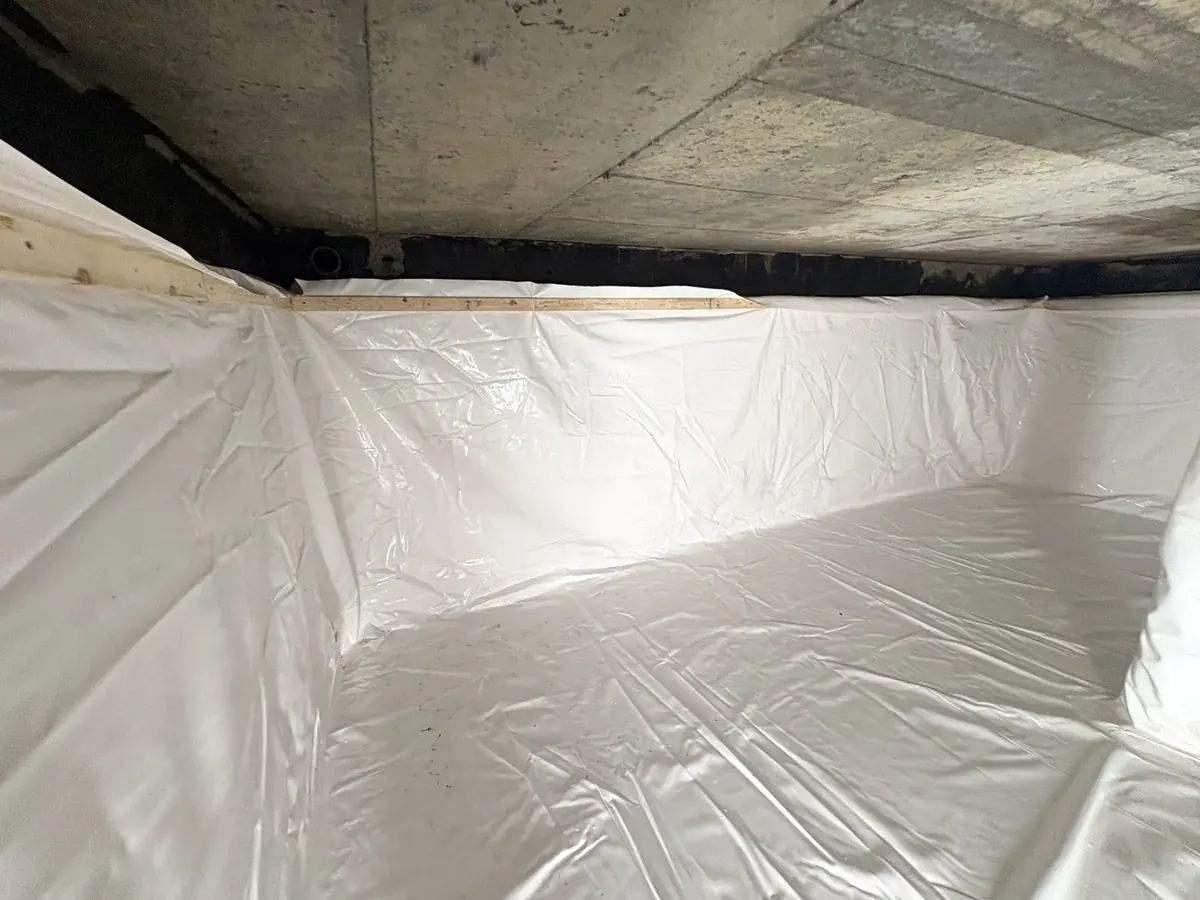
Corners, floor and fittings now sit square and clean. This is what a finished liner should look like before the water goes in.
Before filling
- Liner correctly oriented
- Corners and floor transitions in place
- No cuts, punctures or abrasion
- All fittings completed and checked
- Nothing trapped behind or under the liner
- Pipes independently supported
- Tools, screws, tape ends and packaging removed (count them)
- Photos taken of the finished liner
While filling
- Fill slowly with clean water so the liner settles naturally
- Watch for pulling, tension or odd folds
- Check accessible fittings for weeping
- Inspect seams and openings from the access point
- Pause if anything looks stressed, and call us
- Do not keep filling hoping a problem will “settle out”
Handover
- Clean and sanitize per local rules using products approved for the liner (potable water)
- Save photos, liner ID and install date
- Keep your warranty details
- Record the date it returned to service
- Inspect after any future entry into the cistern
Entering during filling: check seams and openings from the access point wherever possible. If someone must enter at low water levels, apply the same confined-space controls as before: air testing, attendant, ventilation and a clear exit.
If something is not behaving
Stop and work through the table below. When unsure, pause and call us.
| Problem | What to do |
|---|---|
| Corner is far from the cistern corner | The liner is likely rotated or a panel is twisted. Reposition before securing. |
| A fitting does not line up | Do not force it or enlarge the opening. Confirm orientation and call us. |
| Cut or puncture | Do not use tape or an unknown patch. Stop and request the approved repair method. |
| Water behind the liner | Stop and find the source (groundwater, leak, inlet) before continuing. |
| Wrinkles while filling | Some movement is normal. Investigate severe tension or trapped folds. |
| Concrete shedding debris | The surface needs more prep or protection before the liner is positioned. |
Take the full guide with you
The complete 9-page Installation Guide, with all 12 photos, the tools checklist and the pre-fill walk-through. Print it for installation day.
PDF, 4.5 MB. Your project drawings and supplied instructions take precedence. See our warranty for coverage terms.
Installation FAQs
How is a cistern liner installed?
The basic process involves emptying the cistern, preparing the interior, addressing conditions that could damage the liner, positioning the custom liner, securing it as required, and completing details around openings and fittings.
Does the cistern need to be empty?
Yes. The cistern must be drained before the interior can be prepared and the liner installed.
Does the cistern need to be cleaned first?
The interior generally needs to be clean and prepared before installation. Loose debris, sharp objects, unsuitable surfaces, and anything that could damage the liner should be addressed.
Do cracks need to be repaired before lining?
The answer depends on the nature of the cracks. The liner provides water containment, but significant structural defects should be evaluated and repaired where necessary before installation.
Do you install the liner or just manufacture it?
Cistern Liner Co. can provide liner solutions that include professional installation. Contact us with your location and project details so we can determine what service is appropriate for your project.
How long does installation take?
Installation time depends on cistern size, access, condition, preparation requirements, fittings, and project complexity. We can provide a better estimate once we understand the specifics of your cistern.
Can the liner be installed through an existing access hatch?
In many cases, yes, provided the access opening is large enough for safe installation and the configuration of the cistern allows it. Access should be reviewed during project planning.
What happens to pipes and fittings inside the cistern?
Existing penetrations such as inlets and outlets must be incorporated into the liner installation. The exact approach depends on their size, location, type, and condition.
Want a pro to install it?
Tell us your location and project details and we'll recommend the right service.